【jQuery】Bloggerにアコーディオンメニューを設置する方法
BloggerテンプレートにjQueryを使ったアコーディオンメニューを簡単に設置する方法を紹介します。
概要
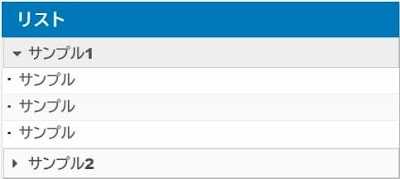
今回説明するのはHTML/JavaScriptガジェットにコピペするだけでアコーディオンメニューを設置する方法です。jQueryを使っているのでヌルっと開閉するアコーディオンメニューを設置できます。
ただし、初回の読み込みが遅くなったり、読み込み時に一瞬リストが表示されることがあります。
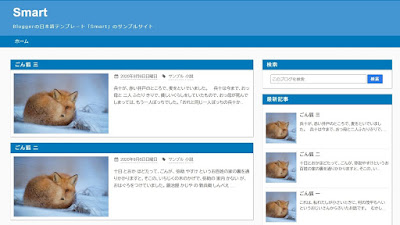
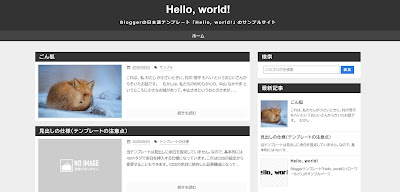
Smart/Hello, world!で使う場合
1.HTML/JavaScriptガジェットにスクリプトを追加
・管理画面 → レイアウト を開く
・メイン → ガジェットを追加 → HTML/JavaScriptガジェットを追加
2.HTML/JavaScriptガジェットに以下のコードをコピペする
・HTML/JavaScriptガジェットにリストのタイトルを付ける
・内容部分に以下のコードをコピペする
<div class="custom-article-list">
<dl>
<dt class="passive">サンプル1</dt>
<dd>
<ul>
<li><a href="http://example.com/">サンプル</a></li>
<li><a href="http://example.com/">サンプル</a></li>
<li><a href="http://example.com/">サンプル</a></li>
</ul>
</dd>
<dt class="passive">サンプル2</dt>
<dd>
<ul>
<li><a href="http://example.com/">サンプル</a></li>
<li><a href="http://example.com/">サンプル</a></li>
<li><a href="http://example.com/">サンプル</a></li>
</ul>
</dd>
</dl>
</div>
<style>
.custom-article-list dl {
padding: 0;
margin: 0;
}
.custom-article-list dt {
font-size: 14px;
font-weight: 900;
color: #555;
background: #fafafa;
border: solid 1px #ccc;
padding: 4px 8px;
}
.custom-article-list dt:hover {
background: #eee;
}
.custom-article-list dd {
margin: 0;
}
.custom-article-list ul {
list-style: none;
padding: 0;
margin: 0;
}
.custom-article-list li a {
display: block;
position: relative;
text-decoration: none;
color: #666;
font-size: 14px;
font-weight: 600;
background: #fefefe;
border-bottom: solid 1px #eee;
padding: 4px 4px 4px 15px;
margin: 0px;
}
.custom-article-list li:nth-child(even) a {
background: #f9f9f9;
}
.custom-article-list li a:hover {
opacity: 1;
background: #eee;
}
.custom-article-list li a::before {
position: absolute;
top: 6px;
left: 2px;
content: "\25AA";
font-size: 1px;
color: #444;
margin-left: 2px;
margin-right: 8px;
}
.active::before {
display: inline-block;
font-family: "Font Awesome 5 Free";
content: "\f0d7";
font-weight: 900;
font-size: 14px;
width: 10px;
margin-right: 5px;
}
.passive::before {
display: inline-block;
font-family: "Font Awesome 5 Free";
content: "\f0da";
font-weight: 900;
font-size: 14px;
width: 10px;
margin-right: 5px;
}
.custom-article-list {
margin: -15px -10px;
-moz-user-select: none;
-webkit-user-select: none;
-ms-user-select: none;
}
.widget .custom-article-list li{
padding: 0;
}
</style>
<script>
$('.custom-article-list dd').hide();
$('.custom-article-list dt').click(function () {
$(this).next().slideToggle();
});
$('.custom-article-list dt').click(function () {
$(this).toggleClass("active");
$(this).toggleClass("passive");
})
</script>
3.コードの内容を書き換える
・<dt>タグ:リストのタイトル
・<li>タグ:リンクのタイトル
項目を追加する場合は<dt>~</dd>をコピペする
その他のテンプレートで使う場合
1.<head>タグ内にfont-awesomeのCDNを記述する
・</head>の上に下記のコードを記述する
<link href='https://use.fontawesome.com/releases/v5.6.1/css/all.css' rel='stylesheet' />
※既にfont-awesomeを読み込んでいる場合は不要
2.HTML/JavaScriptガジェットにスクリプトを追加
・管理画面 → レイアウト を開く
・メイン → ガジェットを追加 → HTML/JavaScriptガジェットを追加
3.HTML/JavaScriptガジェットに以下のコードをコピペする
・HTML/JavaScriptガジェットにリストのタイトルを付ける
・内容部分に以下のコードをコピペする
<div class="custom-article-list">
<dl>
<dt class="passive">サンプル1</dt>
<dd>
<ul>
<li><a href="http://example.com/">サンプル</a></li>
<li><a href="http://example.com/">サンプル</a></li>
<li><a href="http://example.com/">サンプル</a></li>
</ul>
</dd>
<dt class="passive">サンプル2</dt>
<dd>
<ul>
<li><a href="http://example.com/">サンプル</a></li>
<li><a href="http://example.com/">サンプル</a></li>
<li><a href="http://example.com/">サンプル</a></li>
</ul>
</dd>
</dl>
</div>
<style>
.custom-article-list dl {
padding: 0;
margin: 0;
}
.custom-article-list dt {
font-size: 14px;
font-weight: 900;
color: #555;
background: #fafafa;
border: solid 1px #ccc;
padding: 4px 8px;
}
.custom-article-list dt:hover {
background: #eee;
}
.custom-article-list dd {
margin: 0;
}
.custom-article-list ul {
list-style: none;
padding: 0;
margin: 0;
}
.custom-article-list li a {
display: block;
position: relative;
text-decoration: none;
color: #666;
font-size: 14px;
font-weight: 600;
background: #fefefe;
border-bottom: solid 1px #eee;
padding: 4px 4px 4px 15px;
margin: 0px;
}
.custom-article-list li:nth-child(even) a {
background: #f9f9f9;
}
.custom-article-list li a:hover {
opacity: 1;
background: #eee;
}
.custom-article-list li a::before {
position: absolute;
top: 6px;
left: 2px;
content: "\25AA";
font-size: 1px;
color: #444;
margin-left: 2px;
margin-right: 8px;
}
.active::before {
display: inline-block;
font-family: "Font Awesome 5 Free";
content: "\f0d7";
font-weight: 900;
font-size: 14px;
width: 10px;
margin-right: 5px;
}
.passive::before {
display: inline-block;
font-family: "Font Awesome 5 Free";
content: "\f0da";
font-weight: 900;
font-size: 14px;
width: 10px;
margin-right: 5px;
}
.custom-article-list {
margin: -15px -10px;
-moz-user-select: none;
-webkit-user-select: none;
-ms-user-select: none;
}
.widget .custom-article-list li{
padding: 0;
}
</style>
<!-- jQuery CDN -->
<script src="https://ajax.googleapis.com/ajax/libs/jquery/2.2.4/jquery.min.js"></script>
<script>
$('.custom-article-list dd').hide();
$('.custom-article-list dt').click(function () {
$(this).next().slideToggle();
});
$('.custom-article-list dt').click(function () {
$(this).toggleClass("active");
$(this).toggleClass("passive");
})
</script>
4.コードの内容を書き換える
・<dt>タグ:リストのタイトル
・<li>タグ:リンクのタイトル
項目を追加する場合は<dt>~</dd>をコピペする
スポンサーリンク
スポンサーリンク


コメント
0 件のコメント :
コメントを投稿