Bloggerテンプレート自作 #3:ヘッダーを作る
前回の「Bloggerのテンプレートタグを知る」に引き続き、今回は「ヘッダ部分を作る」について実践してみようと思う。
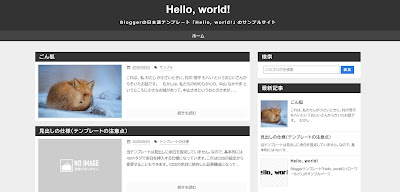
ヘッダ部分とは「ページタイトル」+「サブタイトル」が表示されるページ上部の部分のことで、Bloggerでは通常は「ページヘッダー」の標準ガジェットが配置されている部分になる。
ガジェットが使えたほうが初心者向けになりそうなので、今回は「ページヘッダーガジェット」の設置と、CSSでのデザインについてまとめておくことにする。
作業工程
<body>タグの下にヘッダ部分を記述する
<!-- ヘッダー -->
<header>
<b:section id='ヘッダー' class='page-header'>
<b:widget id='Header1' locked='false' title='Hello, world! (Header)' type='Header' visible='true'>
<b:includable id='main'>
<!-- ここに処理を記述 -->
</b:includable>
</b:widget>
</b:section>
</header>
<header>
<b:section id='ヘッダー' class='page-header'>
<b:widget id='Header1' locked='false' title='Hello, world! (Header)' type='Header' visible='true'>
<b:includable id='main'>
<!-- ここに処理を記述 -->
</b:includable>
</b:widget>
</b:section>
</header>
とりあえず、こんな感じにすれば <!-- ここに処理を記述 --> 部分に記述した処理がヘッダ部分になる。
この部分の記述は、自分がどんな形にしたいかで変わってくる。
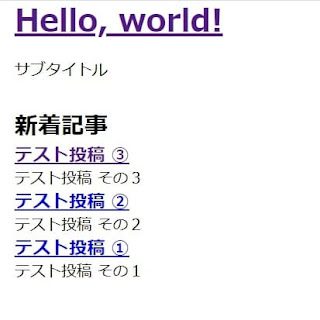
パターン1:単純にブログタイトルとサブタイトルを表示させる
<b:includable id='main'>
<h1><a expr:href='data:blog.homepageUrl'><data:blog.title/></a></h1>
<p><data:description/></p>
</b:includable>
<h1><a expr:href='data:blog.homepageUrl'><data:blog.title/></a></h1>
<p><data:description/></p>
</b:includable>
<b:includable id='main'>の中身をこのようにすれば、<h1>タグでブログタイトルをリンク付きで表示し、その下に<p>タグでサブタイトルを表示させることができる。
しかし、この記述であればレイアウト画面のガジェット設定から背景画像なんかを設定することはできない(表示上は設定できていても、ブラウザ上では反映されない)。
この問題は、CSSで背景画像を設定するなどの方法で回避できるが、初心者には優しくない。
パターン2:ブログタイトルの代わりに画像を表示させる
<b:includable id='main'>
<a expr:href='data:blog.homepageUrl'><img src="画像URL" /></a>
<p><data:description/></p>
</b:includable>
<a expr:href='data:blog.homepageUrl'><img src="画像URL" /></a>
<p><data:description/></p>
</b:includable>
<b:includable id='main'>の中身をこのようにすれば、ブログタイトルを画像で かつ リンク付きで表示し、その下に<p>タグでサブタイトルを表示させることができる。
こちらの方法もレイアウト画面からの編集はできないが、上記で示した方法で問題を回避できる。
パターン3:デフォルトのガジェットを使う
<!-- ヘッダーの条件分岐 -->
<b:includable id='main' var='this'>
<div class='header-widget'>
<b:include cond='data:imagePlacement in {"REPLACE", "BEFORE_DESCRIPTION"}'
name='image' />
<b:include cond='data:imagePlacement not in {"REPLACE", "BEFORE_DESCRIPTION"}'
name='title' />
<b:include cond='data:imagePlacement != "REPLACE"' name='description' />
</div>
<b:include cond='data:imagePlacement == "BEHIND"' name='behindImageStyle' />
</b:includable>
<!-- イメージを背景に -->
<b:includable id='behindImageStyle'>
<b:if cond='data:sourceUrl'>
<b:include cond='data:this.image' data='{image: data:this.image,
selector: ".header-widget"}' name='responsiveImageStyle' />
<style type='text/css'>
.header-widget {
background-position: <data:blog.locale.languageAlignment/>;
background-repeat: no-repeat;
background-size: cover;
}
</style>
</b:if>
</b:includable>
<!-- タイトルをイメージに -->
<b:includable id='image'>
<a class='header-image-wrapper' expr:href='data:blog.homepageUrl'>
<b:include data='{image: data:image,
altText: data:blog.title.escaped,
originalWidth: data:width,
originalHeight: data:height}' name='responsiveImage' />
</a>
</b:includable>
<!-- ブログタイトル -->
<b:includable id='title'>
<h1>
<a expr:href='data:blog.homepageUrl'>
<data:title />
</a>
</h1>
</b:includable>
<!-- サブタイトル -->
<b:includable id='description'>
<p>
<data:this.description />
</p>
</b:includable>
<b:includable id='main'>~</b:includable>までの中身を上記のようにすれば、レイアウト画面からヘッダーガジェットを編集して中身を書き換えられるようになる。
初心者には優しい仕様になるが、コードが複雑になるので、個人で使うなら最初のコード、配布するならこのコードを使うのがベターだと思われる(ここで製作中のテンプレートは配布予定なので、こちらを採用する)。
CSSの編集
/* ----------------------------------------------------------------------------
ページ全体
---------------------------------------------------------------------------- */
body {
background: #eee;
margin: 0;
padding: 0;
}
/* ----------------------------------------------------------------------------
ガジェットのデフォルト設定をリセット
---------------------------------------------------------------------------- */
.section{margin:.0; padding:0;}
.widget{margin:.0; padding:0;}
.widget ul{margin:.0; padding:0;}
.widget ol{margin:.0; padding:0;}
.widget-content li{list-style-type: none;}
/* ----------------------------------------------------------------------------
ヘッダー
---------------------------------------------------------------------------- */
/* ヘッダー全体 */
#Header1 {
text-align: center;
padding: 10px 0;
color: #eee;
background: #333;
width: 100%;
}
/* ブログタイトル */
#Header1 a {
font-size: 40px;
padding: 5px 0;
margin: 3px auto;
text-decoration: none;
color: #fff;
cursor: pointer;
}
/* サブタイトル */
#Header1 p {
font-family: 'メイリオ', sans-serif;
font-size: 15px;
font-weight: bold;
letter-spacing: 0.2em;
margin: 10px 0;
}
<b:skin><


コメント
0 件のコメント :
コメントを投稿